
ေလာကဓာတ္ခန္း သာဂိ – Office Application in the Cloud (20)
အိမ္သုုံး ေက်ာင္းသုုံး ရုုံးသံုုး - GMail နဲ႔ Google Office Application အေျခခံလမ္းညႊန္
(မိုးမခ) ေမ ၁၈၊ ၂၀၁၇
Table မ်ားနဲ႔ အလုပ္လုပ္ျခင္း
Table ဆိုတာကေတာ့ အခ်က္အလက္ေတြကို ၾကည့္ေကာင္းေအာင္ ရွင္းျပလြယ္ေအာင္ နားလည္လြယ္ေအာင္ စုစည္းထားတဲ့ ဇယားကြက္ေတြ ျဖစ္ပါတယ္။ သာမန္ စာစီ စာရိုက္ အပိုက္ခြဲ စာပိုဒ္ေတြနဲ႔ မိမိေဆာင္းပါးကို ေဖာ္မက္ခ်တာအျပင္ Table ေတြနဲ႔လည္း စာစီ စာရိုက္ၾကတာေတြ လုပ္ပါတယ္။ Indent ေတြ ေဖာ္မက္ခ်ျပီး စာေတြ ေနရာခ်ထားတာထက္ ဇယားကြက္ေတြထဲမွာ စာေတြ စီရ ရိုက္ရတာက ပိုျပီး လြယ္ကူ လ်င္ျမန္ပါတယ္။
To insert a table: ေတဘယ္ကို ထည့္သြင္းျခင္း
Table မီးႏဴးကို ဆြဲခ်ျပီးေတာ့ Insert Table ကို ႏွိပ္ပါ။
အဲသည္မွာ Table အတြက္ ေဒါင္လိုက္အကြက္ အလ်ားလိုက္အကြက္ ဘယ္ေလာက္ထည့္မလဲဆိုတာ ေပၚလာပါလိမ့္မယ္။

ေမာက္စ္ကို ဖိဆြဲျပီးေတာ့ ကိုယ္အလိုရွိရာ ဇယားအကြက္ေတြကို ေရြးခ်ယ္ပါ။
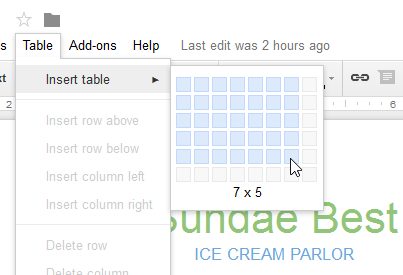
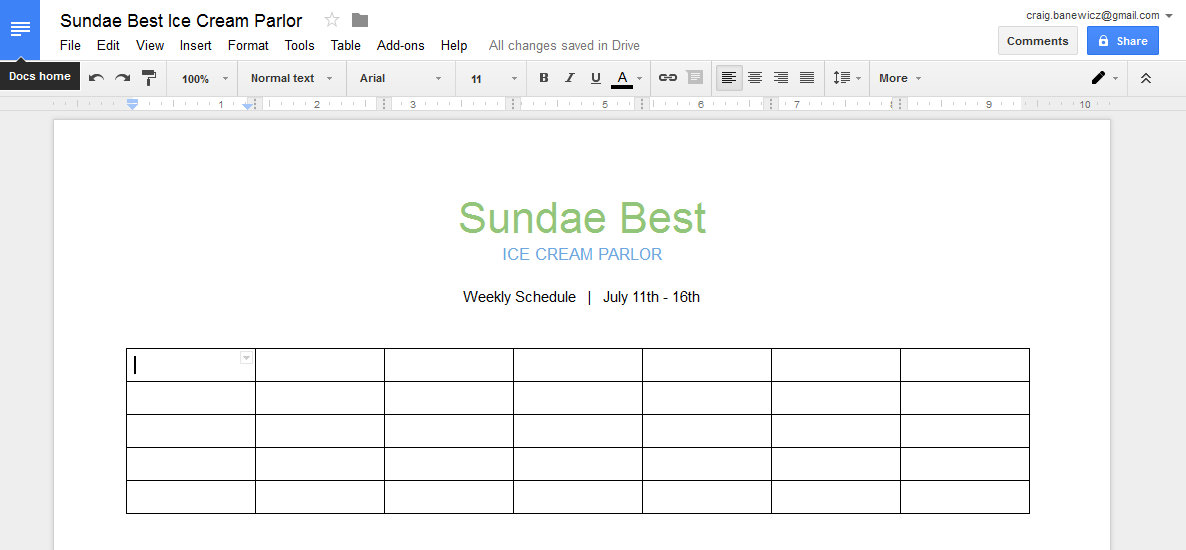
ျပီးေတာ့ ေမာက္စ္ကို ကလစ္ျပီး လႊတ္လိုက္ရင္ မိမိ ကာဆာခ်ထားတဲ့ေနရာမွာ ဇယားကြက္ ေပၚလာပါမယ္။
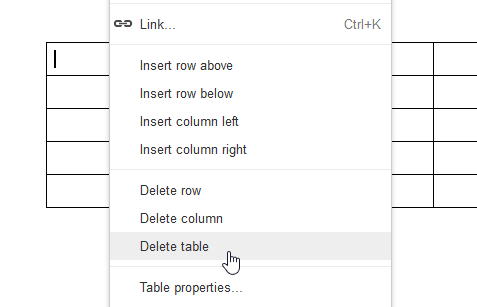
ဇယားကြက္တခုလုံးကို ဖ်က္ခ်င္ရင္ ဇယားေပၚကို ေမာက္စ္ကိုထား၊ Right Click ကိုႏွိပ္ပါ။ အဲသည္မွာ - “Delete Table” command ကို ေရြးလိုက္ရုံပါပဲ။
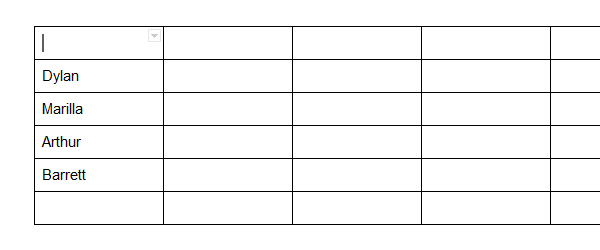
To add an additional row: ကန္႔လန္႔ျဖတ္အတန္း (ROW) ထပ္ထည့္မယ္ ဆိုရင္ -
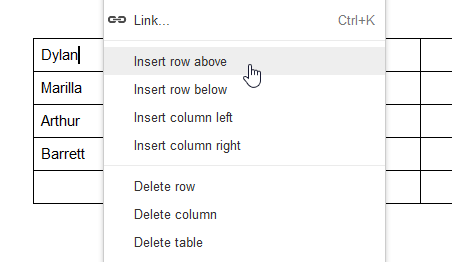
လိုခ်င္တဲ့ row ထည့္ခ်င္တဲ့ကပ္ရက္ row ကို ေရြးခ်ယ္ပါ။ ေမာက္စ္ကို ရိုက္ကလစ္ ႏွိပ္ပါ။ ျပီးေတာ့
Insert row above or Insert row below တခုခုကို ေရြးခ်ယ္ပါ။
ေအာက္မွာ ျပထားတဲ့ အတုိင္း ROW အသစ္တခု ေပၚလာပါလိမ့္မယ္။
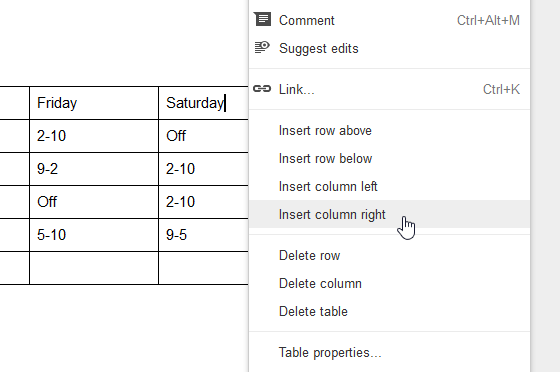
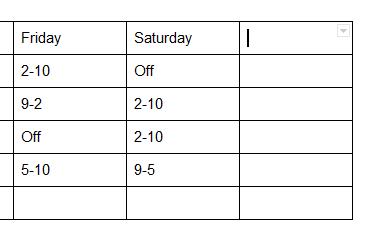
To add an additional column: အေပၚေအာက္အတန္း COLUMN ထည့္မယ္ဆိုရင္
မိမိအလိုရွိရာ ေကာ္လန္ထည့္ခ်င္တဲ့ ကပ္ရက္ ေကာ္လန္ကို ေရြးပါ။ ရုိက္ကလစ္ ႏွိပ္ပါ။ ျပီးေတာ့ Insert column left or Insert column right ကိုေရြးခ်ယ္ပါ။
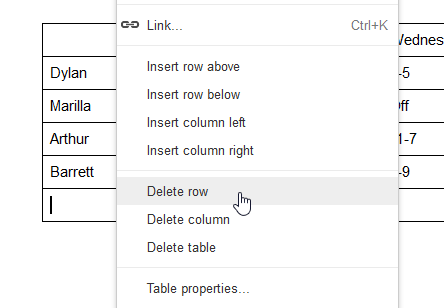
To delete a row or column: ေကာ္လန္ေတြ ရိုးေတြကို ဖ်က္ခ်င္ရင္
ဖ်က္ခ်င္တဲ့ ေကာ္လန္ သို႔မဟုတ္ ရိုးကို အရင္ေရြး၊ ရိုက္ကလစ္ႏွိပ္၊ ျပီးမွ Delete Rom or Delete Column လုပ္ပါ။
Editing table properties - ဇယားကို ေဖာ္မက္ခ်ျခင္း
table properties ဆိုတာက သူ႔ဇယားကြက္တခုခ်င္းစီ - cell dimensions, alignment, border size, and color ေတြ ေျပာင္းတာ ျဖစ္ပါတယ္။
To modify cell dimensions:
Cell ေတြ အကြက္ေတြကို ျပင္ဆင္ခ်င္ရင္ သူ႔ေဘာ္ဒါလိုင္းေတြကို ေရြးခ်ယ္ျပီး ျပင္လို႔ ရပါတယ္။
- ေဘာ္ဒါလိုင္းအေပၚကို ေမာက္စ္ကို ေနရာေရႊ႔ပါ။ ကာဆာေလးကို ျမားႏွစ္သြား အျဖစ္ ပုံေျပာင္းသြားပါလိမ့္မယ္ - double arrow.
- ဖိျပီးေတာ့ ဆြဲလိုက္ရင္ေတာ့ ေျပာင္းလို႔ရတဲ့ လိုင္းဟာ အျပာေရာင္ မ်ဥ္းတံေလးအျဖစ္ လိုက္ပါ လာပါတယ္။
- ေမာက္စ္ကို ဖိထားတာကေန လႊတ္ခ်လိုက္ရင္ေတာ့ cell အျမင့္ ေျပာင္းသြားတာကို ေတြ႔ရပမယ္။
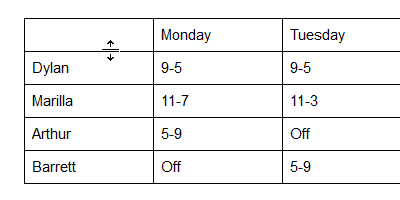

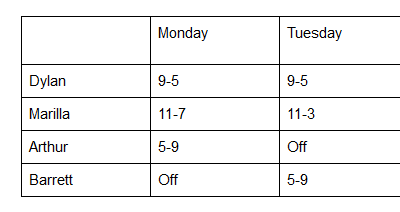
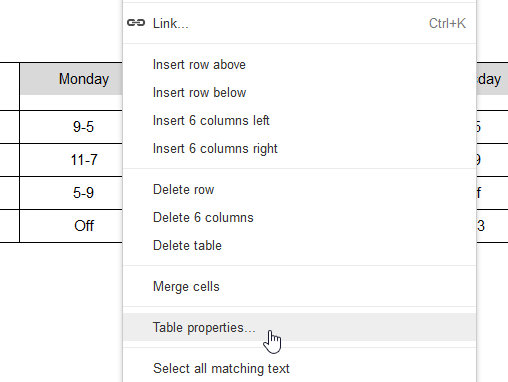
Table Properties ကို Table ေပၚမွာ ေမာက္စ္ကို ထား၊ Right Click လုပ္ျပီးေတာ့၊ ဆလက္လုပ္ျပီးေတာ့လည္း ေရြး်ခ်ယ္ ျပင္ဆင္မႈေတြ လုပ္ႏိုင္ပါတယ္။

To modify horizontal cell alignment: ဇယားကြက္ေတြကို ဘယ္ညာ အလယ္ ညိွျခင္း
ဇယားကြက္အတြင္းက စာသားေတြကို ဘယ္၊ ညာ၊ အလယ္၊ တေျပးညီ ညိွတာေတြ လုပ္လို႔ရပါတယ္။ ဒါကို မီႏူးဘားေပၚက four alignment buttons in the shortcut toolbar ကို သံုးျပီး လုပ္ရပါတယ္။
- Cell တခု သို႔မဟုတ္ Cell ေတြကို ေရြးခ်ယ္ပါ။

- မိမိႏွစ္သက္တဲ့ ဘယ္ညာအလယ္ ညိွ ခလုပ္ကို ေရြးလ်ယ္ပါ။ alignment button from shortcut toolbar.
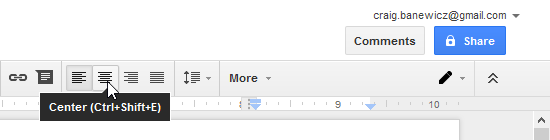
- စင္တာကို ေရြးရင္ အလယ္ကို ညိွပါမယ္။ ဘယ္၊ အလယ္၊ ညာညိွ အျပင္ တေျပးညီ ညိွ (Justify) လုပ္တာကိုလည္း သင္တန္းဆရာက ျပသရပါမယ္။
To modify vertical cell alignment: Cell မ်ားကို အေပၚေအာက္ ညိွျခင္း
Vertical cell alignment ဆိုတာက cell အတြင္းထဲက စာသားေတြ စာပိုဒ္ေတြကို ေဒါင္လိုက္စီရာမွာ cell ထိပ္ကေန စီရမလား၊ cell အလယ္ေကာင္ကေန စီမလား၊ cell အေျခကေန စီလားဆိုတာ ေရြးခ်ယ္တာ ျဖစ္ပါတယ္။ Cell vertical alignment in the Table properties dialog box ကေန ျပင္ဆင္လို႔ရပါတယ္။
- ျပင္ခ်င္တဲ့ cell ေတြကို ေရြးပါ။

- Right-click and select Table properties
- Table Properties ထဲက Cell vertical alignment ဆိုတာကို ဆြဲခ်ပါ။

- ႏွစ္သက္ရာ အထက္ေအာက္ ညိွမႈကို ေရြးပါ။
- Click OK


To modify border size: ဇယား၏ ေဘာင္မ်ားကို ဆိုက္ေျပာင္းျခင္း
- Table properties ထဲမွာပဲ Table border size ကို ဆြဲခ်ျပီးေတာ့ Table ရဲ့ ေဘာင္ေတြကို အထူ အပါး ေျပာင္းလို႔ ရပါတယ္။
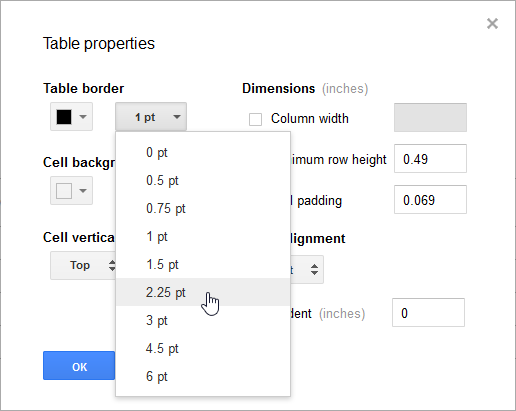
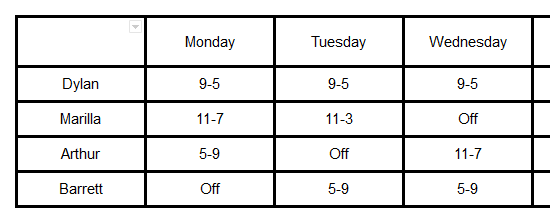
- ေအာက္ပါအတုိင္း ေဘာင္ေတြ ထူသြားတာ ေတြ႔ရပါမယ္။
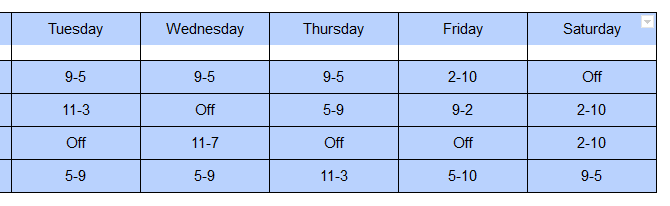
To change cell background color: ဇယားကြက္အတြင္း အေရာင္ထည့္ျခင္း
- မိမိအေရာင္ေျပာင္းခ်င္တဲ့ Cell သို႔မဟုတ္ Cells ေတြကို ေရြးပါ။
- Right-click and select Table properties
- Table Properties ထဲက Cell background color ကို ဆြဲခ်ျပီး အေရာင္ထည့္ပါ။

- အခုလို ေအာက္ပါအတုိင္း ေျပာင္းသြားပါလိမ့္မယ္။

To modify border color: ဇယား၏ ေဘာင္ကို အေရာင္ေျပာင္းျခင္း
- Table properties ထဲက Table border color ကို ဆြဲခ်ျပီး table ၏ ေဘာင္ကို အေရာင္သြင္းတာ ေျပာင္းတာ လုပ္လို႔ရပါတယ္။
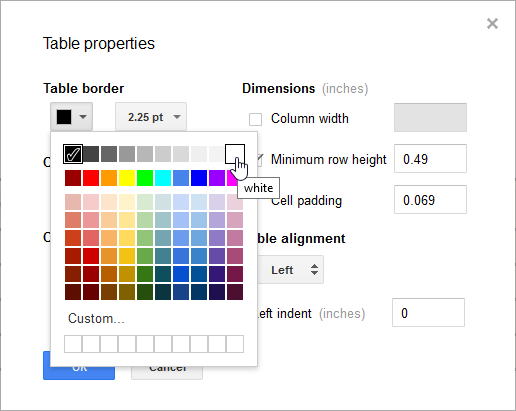
- ေအာက္ပါအတိုင္း အျဖဴေရာင္ ေဘာ္ဒါကာလာ ေျပာင္းသြားပါမယ္။

ေလ့က်င္ခန္း
Sundae Best
ICE CREAM PARLOR
Weekly Schedule | July 11th - 16th
Monday
|
Tuesday
|
Wednesday
|
Thursday
|
Friday
|
Saturday
| |
Dylan
|
9-5
|
9-5
|
9-5
|
9-5
|
2-10
|
Off
|
Marilla
|
11-7
|
11-3
|
Off
|
5-9
|
9-2
|
2-10
|
Arthur
|
5-9
|
Off
|
11-7
|
Off
|
Off
|
2-10
|
Barrett
|
Off
|
5-9
|
5-9
|
11-3
|
5-10
|
9-5
|
ဒီဇယားကို မိမိဖိုင္အျဖစ္ ေကာ္ပီပြားပါ။ ျပီးေတာ့ ေအာက္ပါအတိုင္းျဖစ္ေအာင္ စမ္းသပ္ပါ။

(ဆက္လက္ ေဖာ္ျပပါမည္)