
ေလာကဓာတ္ခန္း သာဂိ – Office Application in the Cloud (26)
အိမ္သုုံး ေက်ာင္းသုုံး ရုုံးသံုုး - GMail နဲ႔ Google Office Application အေျခခံလမ္းညႊန္
(မိုးမခ) ဇူလိုင္ ၂၆၊ ၂၀၁၇
Formating - ေနရာအထားအသို
Spreadsheet က Cell ေတြမွာ စာသားေတြ ဂဏန္းေတြ ရိုက္ထည့္တဲ့ဆီမွာ formatting လုိအပ္ပါတယ္။ သေဘာကေတာ့ မိမိစာရင္းဇယားရဲ့ အထားအသို ေနရာ အျမင္ ကို Look and Feel ေကာင္းေစဖို႔ ျဖစ္ပါတယ္။ သည္ေတာ့ စာသား ကိန္းဂဏန္းေတြရဲ့ size, style, and color တို႔ text alignment တို႔ borders နဲ႔ background colors ေတြကို ျပင္ဆင္ဖို႔ ေလ့လာထားရပါမယ္။
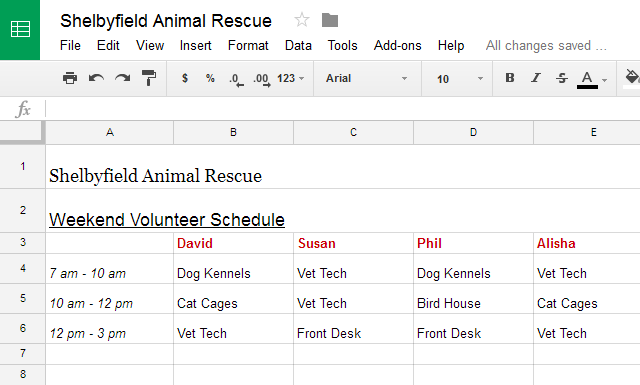
To change the font size: ေဖာင့္ဆိုက္ကို ျပင္ဆင္ျခင္း
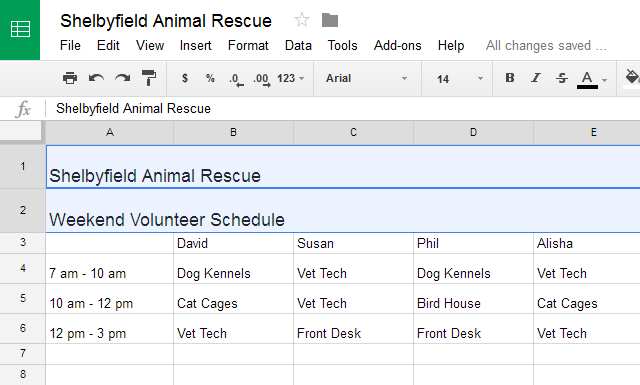
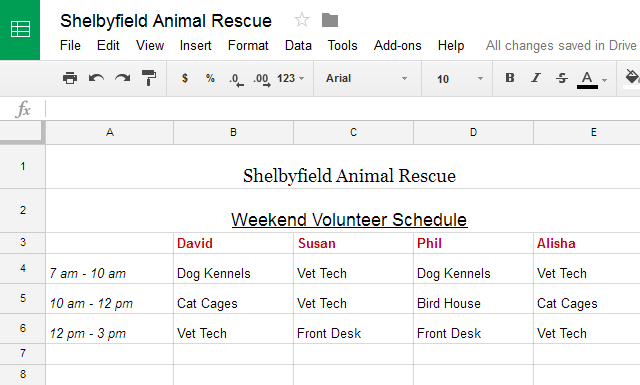
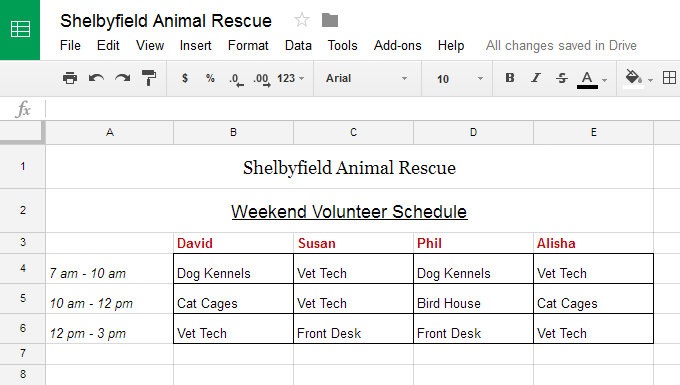
မိမိစာရင္းစာမ်က္ႏွာ ေခါင္းစဥ္ကို header cells လို႔ ေခၚပါတယ္။ ဒါကို အျခား ဆဲလ္ေတြနဲ႔ မတူေအာင္ ျပင္ဆင္ေပးရပါတယ္။
- ပုံကို ၾကည့္ပါ။ ထိပ္ဆုံးက ဆဲလ္ေတြထဲက ေခါင္းစဥ္ေတြကို ျပင္ၾကရေအာင္။ Row 1 and 2 ကို ဆလက္လုပ္ပါ။
- Font Size button ကို toolbar ကေန ဆြဲခ်ပါ။ ဆိုက္ကို 14 ေျပာင္းပါ။
- ေဖာင့္ဆိုက္အသစ္ ေျပာင္းျပီး ျဖစ္သြားပါမယ္။


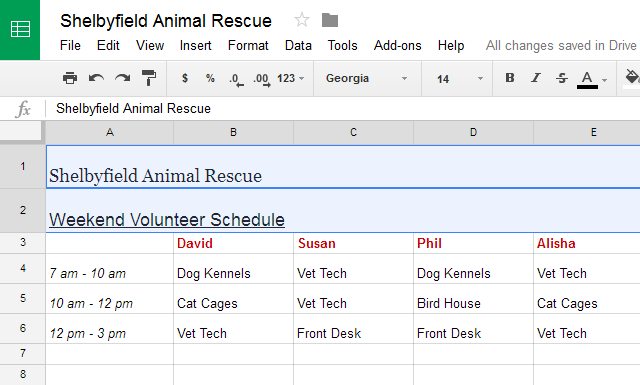
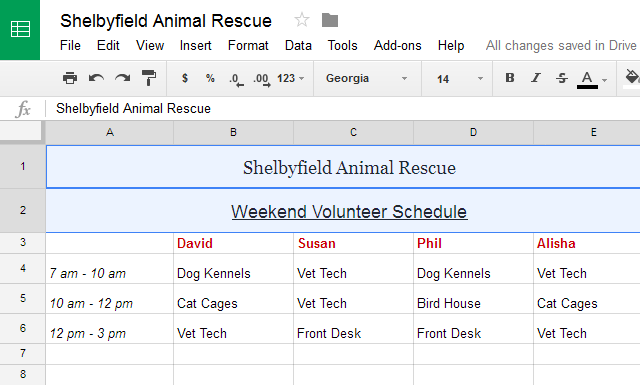
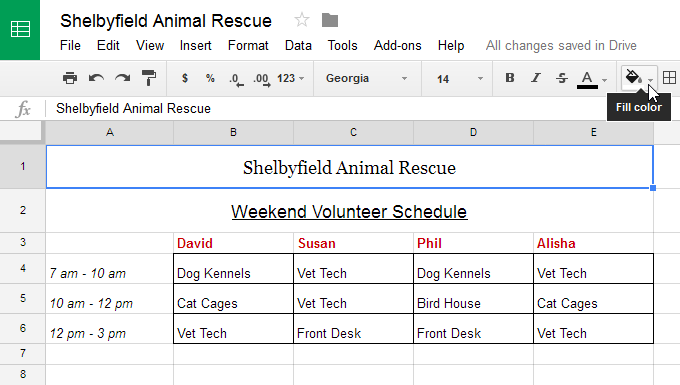
To change the font: ေဖာင့္အမ်ဳိးအစားကို ေျပာင္းျခင္း
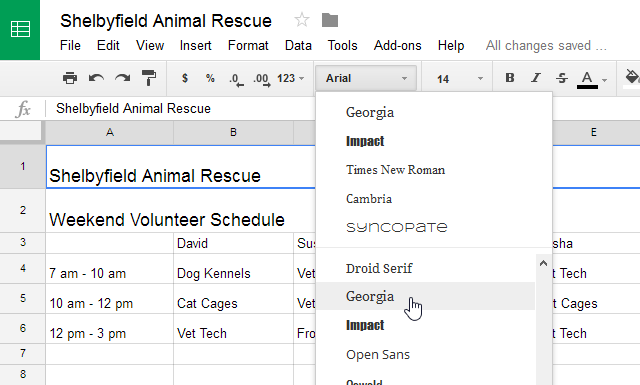
- ျပင္ခ်င္တဲ့ ဆဲလ္ သို႔မဟုတ္ ဆဲလ္ေတြကို ဆလက္ အရင္လုပ္ပါ။
- Format ဆိုတာကို toolbar menu ကေန ဆြဲခ်ပါ။
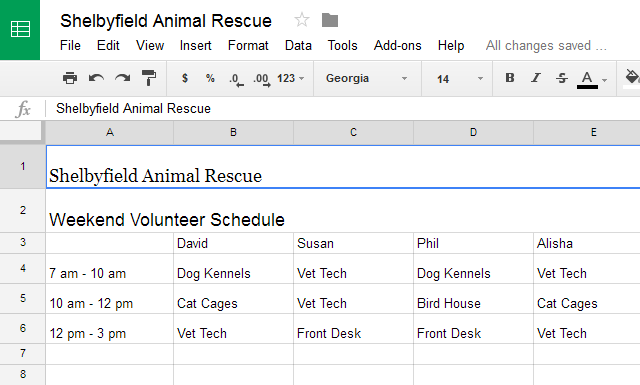
- ေမာက္စ္ကို Font ဆိုတဲ့ ေနရာမွာ သြားျပီး ခ်ိန္ဆလိုက္ပါ။ ေဖာင့္စာရင္းမ်ဳိးစုံ ေရြးႏိုင္တာ ေတြ႔ရပါမယ္။Georgia ေဖာင့္စာလုံးကို ေရြးလိုက္ပါ။
- ေဖာင့္ပုံစံ အသစ္တခု ေျပာင္းျပီး ျဖစ္ပါမယ္။
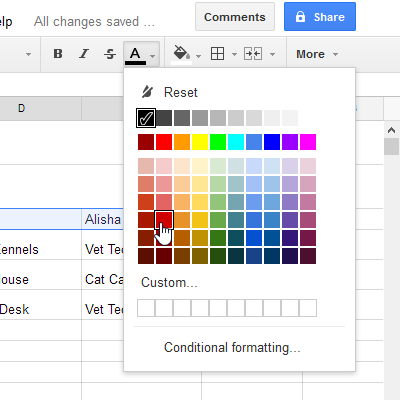
To change the text color: ေဖာင့္အေရာင္မ်ား ေျပာင္းျခင္း
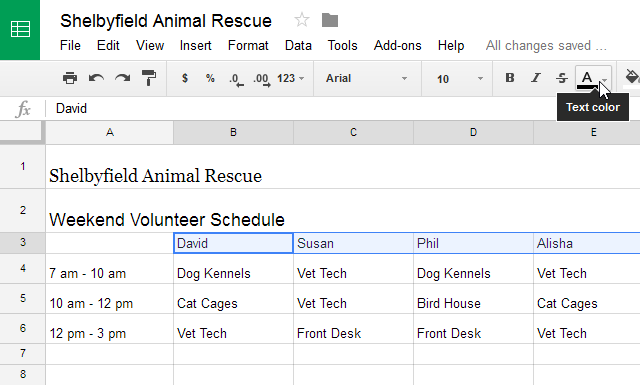
- ျပင္ခ်င္တဲ့ ဆဲလ္ကို အရင္ ေရြးပါ။
- Text color button ကို toolbar ကေန ဆြဲခ်ပါ။
- text colors drop down menu ဆိုတာမွာ အေရာင္မ်ဳိးစုံ ေတြ႔ရမယ္။
- ၾကိဳက္တဲ့ အေရာင္ကို ေရြးပါ။ အခုကေတာ့ အနီ ေရာင္ကို ေရြးပါ။
- ေဖာင့္အေရာင္ ေျပာင္းျပီး ျဖစ္ပါလိမ့္မယ္။

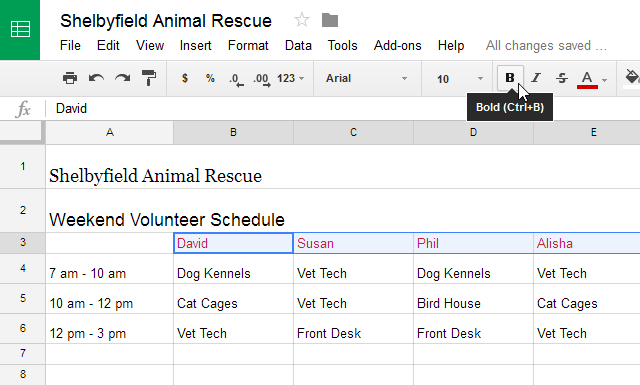
To make text bold: ေဖာင့္ကို Bold လုပ္ျခင္း
- ျပင္ခ်င္တဲ့ ဆဲလ္က စာသားေတြကို ေရြးပါ။
- bold လုပ္ခ်င္ရင္ Bold text button ကို ႏွိပ္။ ကီးဘုတ္ ေရွာ့ကပ္သုံးခ်င္ရင္ေတာ့ press Ctrl+B (Windows) or Command+B (Mac) ကို ႏွိပ္ရပါတယ္။
- Bold လုပ္တာကို ေတြ႔ရပါမယ္။

Press Ctrl+I (Windows) or Command+I (Mac) က စာလုံးေစာင္း italics.
Press Ctrl+U (Windows) or Command+U (Mac) က စာလုံးကို မ်ဥ္းတားေပးတာ underlining.
Text alignment စာသားမ်ားကုိ ဘယ္ညာအလယ္ ညိွျခင္း
ပုံမွန္ကေတာ့ ဆဲလ္စာသားေတြက ဘယ္ညိွထားျပီးသား ျဖစ္ပါတယ္။ ဘယ္ညိွတာမွာ ဆဲလ္ရဲ့ ေအာက္ေျခမ်ဥ္းနားမွာ ကပ္ျပီး ညိွထားတာပါ။ aligne to the bottom-left of a cell လို႔ ေခၚပါတယ္။ နံပါတ္ေတြ ကဏာန္းေတြဆိုရင္ေတ့ာ ဆဲလ္ေအာက္ေခ်မ်ဥ္းနားကပ္ျပီး ညာညိွထားေလ့ ရွိပါတယ္။ aligned to the bottom-right of a cell လို႔ ေျပာပါတယ္။ ဒီလို alignment ေတြကိုလည္း ေျပာင္းလဲလို႔ ရပါတယ္။
To modify the horizontal text alignment: ဆဲလ္ကို အလ်ားလိုက္ ဘယ္၊ ညာ၊ အလယ္ညိွျခင္း
- မိမိညိွလိုတဲ့ ဆဲလ္ကို ေရြးပါ။
- Horizontal align button ကို toolbar ကေန ေရြးခ်ယ္ပါ။ alignment drop-down menu ကေန ေရြးရတာ ျဖစ္ပါတယ္။
- စာသားေတြ ညိွျပီး ျဖစ္ပါျပီ။

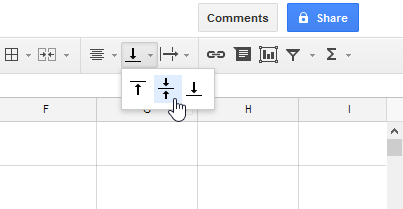
To modify the vertical text alignment: စာသားေတြကို ေဒါင္လိုက္ အေပၚ ေအာက္ အလယ္ ညိွျခင္း
- အလိုရွိရာ ဆဲလ္ကို ဆလက္လုပ္ပါ။
- Vertical align button ကို toolbar ကေန ေရြးခ်ယ္ပါ။ alignment အလိုရွိရာကို drop-down menu ကေန ေရြးပါ။
- စာသားေတြ ေဒါင္လိုက္ ညိွတာ လုပ္ျပီး ျဖစ္ပါတယ္။
Alignment ဆိုတာမွာ Horizontal အလ်ားလိုက္ Vertical ေဒါင္လိုက္ ေနရာညိွတာကို ဆဲလ္တခုတည္းမွာ ၂ မ်ဳိးစလုံး လုပ္ႏိုင္တာ ေတြ႔ရပါမယ္။ စမ္းသပ္ၾကည့္ပါ။
Cell borders and background colors ဆဲ၏ ေဘာင္နဲ႔ ေနာက္ခံအေရာင္
ဆဲလ္ေတြကို မီးခိုးေရာင္ ေဘာ္ဒါလိုင္းေတြနဲ႔ ေနရာခ်ထားေပမယ့္ ဒါေတြက အျမင္သက္သက္ ျဖစ္ပါတယ္။ တကယ္တန္း ေဘာင္ခတ္ထားတဲ့ ေဘာ္ဒါလိုင္းေတြ မဟုတ္ေသးပါ။ ျပီးေတာ့ တကယ္ကို စာရင္းကို ပရင့္ထုတ္တဲ့အခါ အေရာင္ေတြ ဘာေတြ ေနာက္ခံ မထည့္ရေသးပါဘူး။ ဒါေတြကိုလည္း ေဖာ္မက္တင္း လုပ္လို႔ ရပါတယ္။
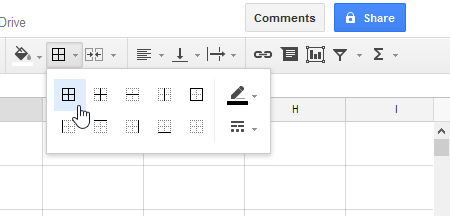
To add cell borders: ဆဲလ္မွာ ေဘာ္ဒါထည့္ျခင္း
- အလိုရွိရာ cell ကို ဆလက္လုပ္ပါ။
- Borders button ကို ႏွိပ္ပါ။ drop-down menu ကေန အလိုရွိရာ ေဘာင္ခတ္တာကို ေရြးပါ။ အခု ဥပမာမွာကေတာ့ ဆဲလ္တခုလုံးကို ေဘာ္ဒါလိုင္း ခတ္ပါမယ္။ all cell borders.
- ဆဲလ္ကို ေဘာ္ဒါခတ္ မ်ဥ္းေတြ ဆြဲျပီးပါျပီ။

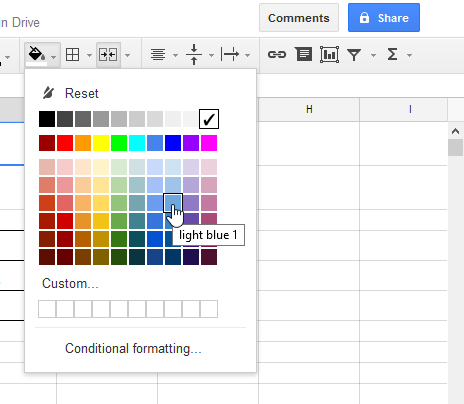
To change the fill color: ဆဲလ္ကို အေရာင္သြင္းျခင္း
ဘက္ဂေရာင္းကာလာထည့္တယ္ ဆိုတာကို Fill Color လုပ္တယ္လို႔ ေခၚပါတယ္။ fill color.
- အလိုရွိရာ ဆဲလ္ကို ဆလက္လုပ္ပါ။
- Fill color button ကို toolbar ကေန ဆြဲခ်ပါ။
- ကာလာမ်ဳိးစုံကို drop-down menu ကေန ေတြ႔ရပါမယ္။ ဒီဥပမာမွာ blue ကာလာကို ေရြးပါ။
- ဘက္ဂေရာင္း အေရာင္ ေျပာင္းသြားပါျပီ။

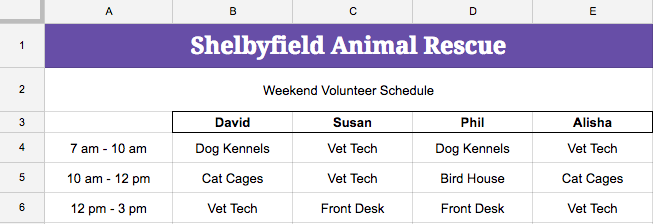
Challenge! အိမ္စာ
- ေအာက္ပါအတိုင္း ျဖစ္ေအာင္ မိမိ၏ spreadsheet ကို ေအာက္ပါအတိုင္း ျဖစ္ေအာင္ ေဆာင္ရြက္ပါ။
Comments